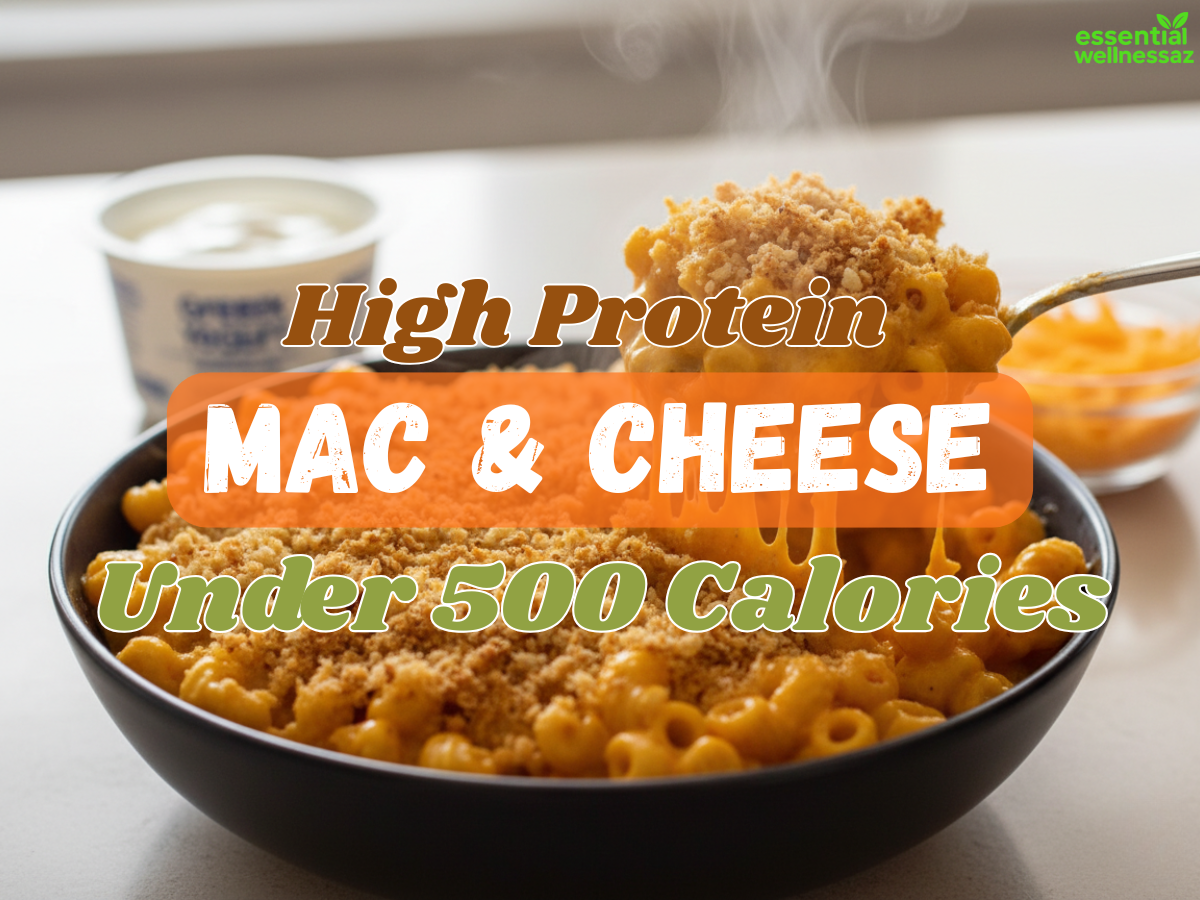
High Protein Mac & Cheese Under 500 Calories
Why This High-Protein Mac & Cheese Works This recipe succeeds because it balances protein, carbs, and fat instead of eliminating...
Why This High-Protein Mac & Cheese Works
This recipe succeeds because it balances protein, carbs, and fat instead of eliminating any one of them. You still get real pasta and real cheese—just in smarter ratios.
More Protein, Less “Crash” (Satiety Basics)
Protein slows digestion and helps stabilize blood sugar, which means fewer cravings after eating. A standard boxed mac & cheese has about 10–12 g of protein per serving. This version delivers 28–35 g of protein, depending on add-ins. That difference matters: studies consistently show meals with at least 25 g of protein improve satiety at the next meal. By combining pasta with high-protein cheese, milk, and optional Greek yogurt or cottage cheese, you get sustained fullness without feeling heavy.
The Simple Calorie-Control Levers
Instead of removing cheese, this recipe adjusts where calories come from. Butter is limited to 1 tbsp total, milk is measured at 1½ cups, and cheese is used strategically for flavor impact. Baking at 375°F creates a crisp topping so you need less cheese inside the sauce. The result: about 480–500 calories per serving, compared to restaurant versions that often exceed 800 calories.
Ingredients and Smart Substitution
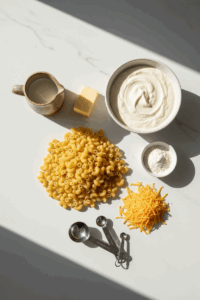
With the logic clear, let’s talk ingredients—because small swaps can change both protein and calories fast.
Best Pasta Picks (and Portion Guidance)
Elbow macaroni works best for classic texture, but portion size is key. Use 8 oz (½ lb) dry pasta, which makes about 4 cups cooked—perfect for 4 servings. For extra protein, try chickpea or lentil pasta; many brands provide 12–14 g protein per 2 oz dry. Whole-wheat pasta is another option, though its protein boost is smaller. Avoid ultra-low-carb pastas here—they don’t hold sauce well when baked.
Cheese Choices for Flavor + Protein
Sharp cheddar and Gruyère are ideal because strong flavor means you can use less. Sharp cheddar provides about 7 g protein per oz, while Gruyère adds meltiness without excess grease. Use 4 oz total cheese inside the sauce. For topping, ¼ cup panko breadcrumbs adds crunch so you don’t need extra cheese on top.
Milk, Butter, Flour (and Lighter Swaps)
Whole milk creates creaminess with less cheese, but 2% milk works fine and saves about 20 calories per cup. Flour thickens the sauce with just 1½ tbsp, and butter stays at 1 tbsp total. For higher protein, replace ½ cup milk with ½ cup plain nonfat Greek yogurt or blended low-fat cottage cheese—both add 8–12 g protein with minimal calories.
Step-by-Step Instructions
Now let’s walk through the cooking process. Each step is simple and fast, with no special equipment required.
Step 1 — Boil Pasta to Al Dente
Cook pasta in well-salted water according to package directions, stopping 1 minute early so it stays firm during baking.

Step 2 — Make a Quick Roux
In a saucepan, melt 1 tbsp butter over medium heat, whisk in 1½ tbsp flour, and cook for 60 seconds until lightly foamy.
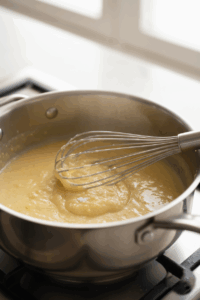
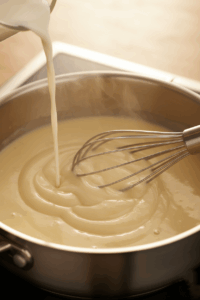
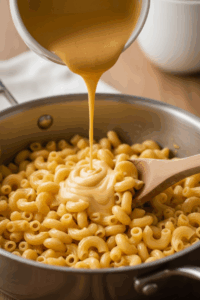
Step 3 — Build the Sauce
Slowly whisk in 1½ cups milk, cooking 3–4 minutes until thick enough to coat a spoon.
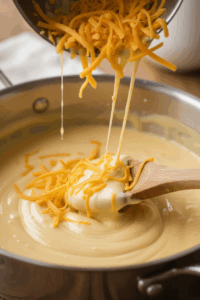
Step 4 — Melt the Cheese
Lower heat and stir in 4 oz shredded cheese until smooth; remove from heat.
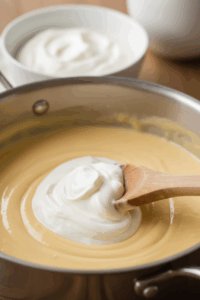
Step 5 — Boost the Protein
Stir in ½ cup Greek yogurt or blended cottage cheese (optional but recommended) until fully incorporated.
Step 6 — Combine Pasta and Sauce
Fold drained pasta into the sauce, mixing gently to coat every piece.
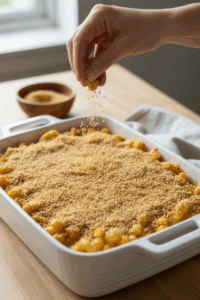
Step 7 — Assemble
Transfer to a lightly greased baking dish; sprinkle ¼ cup panko breadcrumbs on top.
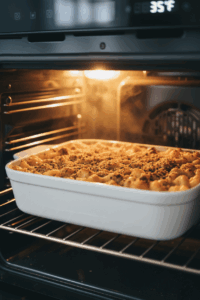
Step 8 — Bake
Bake at 375°F for 20 minutes, until bubbly with a lightly golden crust.
Protein Boost Options (No Weird Ingredients)
Once you master the base recipe, adding protein becomes easy—and customizable.
Greek Yogurt or Cottage Cheese Add-In Method
If you’re nervous about tang, don’t worry. Blending low-fat cottage cheese until smooth makes it neutral and creamy. Adding ½ cup increases protein by about 12 g per serving while keeping calories nearly the same. Always remove the sauce from direct heat before stirring in yogurt to prevent curdling.
Add-Ins: Chicken, Tuna, or Veggies
For even more protein, stir in 1½ cups cooked chicken breast (about 36 g protein total) or 1 can tuna, drained. Veggie add-ins like broccoli or spinach boost volume and fiber without many calories. Keep add-ins under 2 cups total so the dish stays creamy and balanced.
Meal Prep, Storage, and Reheating
This mac & cheese is designed to hold up well for leftovers—if you store it correctly.
Fridge/Freezer Times and Best Containers
Store cooled mac & cheese in airtight containers for up to 4 days in the refrigerator. For freezing, portion into single servings and freeze up to 2 months. Use shallow containers so it cools quickly and reheats evenly.
Reheat for Creamy (Not Dry) Mac
Reheat in the microwave at 50% power, adding 1–2 tbsp milk per serving and stirring halfway through. In the oven, cover with foil and reheat at 325°F for 15–20 minutes. Avoid high heat—it dries out the sauce.
Tips & Smart Swaps
- Use sharp cheese to reduce total ounces without losing flavor
- Add protein powder? Skip it—texture suffers when baked
- Chickpea pasta boosts protein but needs extra sauce
- Toast panko lightly for deeper crunch
- Add smoked paprika for “baked” flavor without calories
- Keep salt modest; cheese already adds sodium
FAQ
Is high-protein mac & cheese actually filling?
Yes—protein slows digestion and increases satiety hormones. With about 30 g protein per serving, this version keeps most people full for 3–4 hours, compared to traditional mac & cheese that often leaves you hungry soon after.
Can I make this gluten-free?
Absolutely. Use gluten-free pasta and substitute cornstarch (1 tbsp) for flour in the roux. Cook the sauce gently and whisk constantly to avoid clumping.
Does Greek yogurt make it taste sour?
Not when used correctly. Stir it in off heat and balance with sharp cheese. Most testers can’t detect tang, only extra creaminess.
How do I keep calories under 500?
Stick to the measured pasta, cheese, and butter amounts. Extra cheese or large add-ins are the fastest way calories creep up.
Is this good for weight loss?
It can fit into a calorie-controlled plan because it’s filling, portioned, and protein-forward—but overall results depend on total daily intake.
Call to Action
Love comfort food that actually fits your goals? Save this high-protein mac & cheese, try it this week, and share it with someone who thinks “healthy” can’t be creamy.
Disclaimer: This content is for informational purposes only and is not a substitute for professional medical advice.
High Protein Mac & Cheese Under 500 Calories
Method
- Step 1 — Boil pasta to al dente

- Step 2 — Make a quick roux
- Step 3 — Build the sauce
- Step 4 — Melt the cheese
- Step 5 — Boost the protein (yogurt/cottage cheese)
- Step 6 — Combine pasta and sauce
- Step 7 — Assemble + breadcrumb topping
- Step 8 — Bake (golden + bubbly)

About Mr. Anh
We turn solid evidence into everyday habits Americans can actually do—plain English, cups/oz, grocery-aisle swaps, and routines that fit real life. Our editorial process: Experience—we road-test tips in real schedules…